There is nothing fast you can do here. This Road Top upgrade needs time and patience. No way you are going to do this in 30 minutes as shown on You Tube.
BHPian sandeepmohan recently shared this with other enthusiasts.
This post is about a Apple Car Play/Android Auto box install. The product is made by the ever popular and known brand called Road Top. I think there are a few Audi users here who’ve done the install.
Road Top decoder box for CIC HI enabled Head Units
My car is a Japanese Import of a 2013 328i sedan. The idrive is practically useless in this day and age. The only thing working or doing its job being the radio and Bluetooth audio streaming. While the inbuilt navigation was updated by the dealer to New Zealand maps, it is a pain to use and outdated in terms of knowledge of roads.
For BMW’s and maybe even most other cars, the compatibility of Road Top products depends on the generation of your car stereo. The stock BMW head unit I have is the older generation one known as CIC HI. Make sure you order the right one. The plus side is that the chaps at Road Top are proactive online and you get a response to a query fast.
I went with the usual box unit where the stock head unit plugs into it and you link the car’s stock center console display to the Road Top box. They have another version where the entire screen is replaced to a touch screen unit and the hardware is also housed in that new screen (No external decoder box). I did think about. The cost was quite a bit higher which is why I didn’t buy one.
I attempted this as a two part DIY. Thanks to several users on the tube who’ve shared their install process. This helped immensely. The hardest part of the job is unmounting/refitting the glovebox, followed by all the cable routing required more for CIC HI head units. Units after this such as the NBT and Evo series are a little less complicated to install.
Challenges faced:
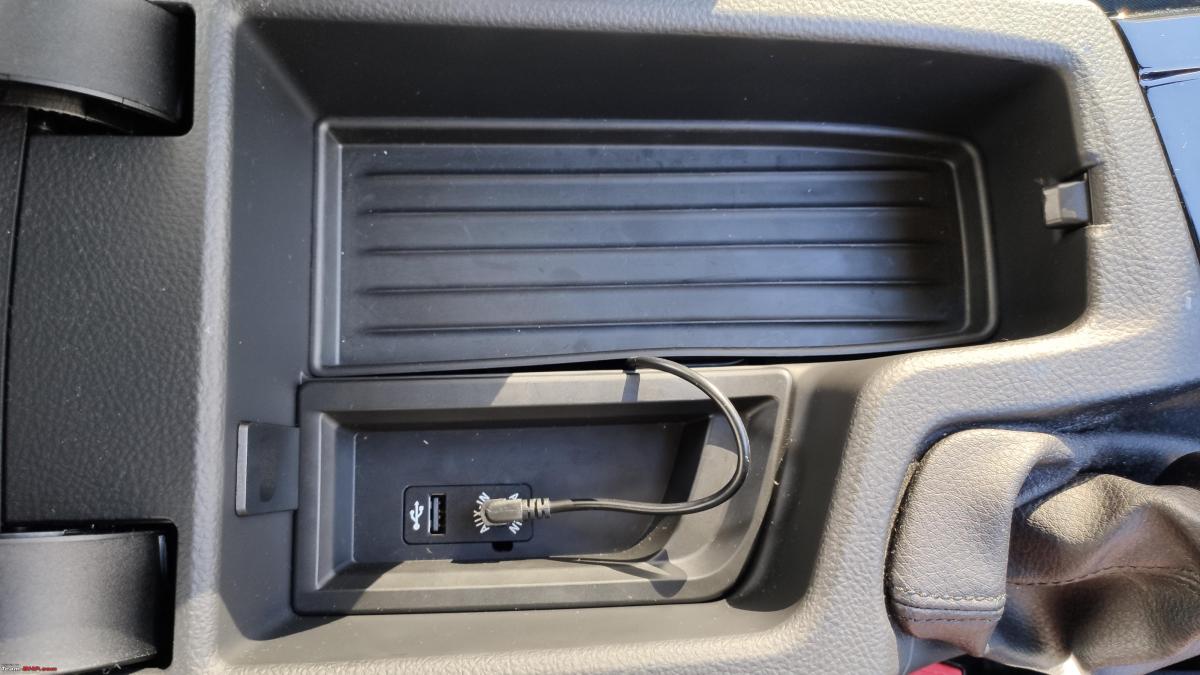
- Routing of the Aux audio cable from the Road Top unit to the center armrest console, where you have a USB and Aux input. This needs to be plugged in else there won’t be any audio.
- Tapping the stock mic from the roof liner with the Road Top supplied mic jumper cable and routing it through the dashboard.
- Tidying up all the wiring can be time consuming.
- This part is specific to my car only. Being a Japanese import, the previous owner had fitted what looked like another Apple Car Play/Android Auto box, which ended up being a TV Tuner sort of thing as I later discovered. Removal of this unit took time as I had to trace all the wiring and not cut off, remove anything by accident.
- Dropping and refitting the glovebox
Tools:
- A trim Removal Tool
- A T20 and T25 Torx screwdriver
- A small reversible ratchet wrench which can handle T20 and T25 screw heads and sockets
- A motor driven screw driver, if you can manage. Makes the job a whole lot easier, as I later discovered.
- A lot of patience
- Fine work Gloves or Band aid. Brace yourself for a few small cuts and bruises
DIY Part 1 : Started and Abandoned
I started with pulling off some of the dash trim, which came off as expected based on all the footage I had watched. Disconnecting some of the cables, especially the center console screen can be hard as the cable length from the head unit isn’t much. Plus, the cable is a tight fit behind the screen.
You go in this order for all the trim removal:
- Ambient lighting plastic trim unit below the Climate Control
- Removal of center console AC vents. This starts from the passenger side to the middle. It is one long piece. Does pop of easily. You have two cables to release in this step. The Hot/Cold air mix and the Hazard Light/Central Lock switch.
- Unscrewing of climate control unit and removal of the control cable
- Unscrewing the head unit
- Removal of the lower tray unit, below the glovebox.
- If you’re car has a knee air bag, then you need to remove this.
- Dropping the glovebox
In all of the above, I’d say dropping the glovebox was the hardest. 9 screws secure the glovebox and they are not easily accessible, which is where a motor driven tool comes handy. Mounting back the glovebox can be a challenge.
Fortunately (or unfortunately) my car did not come with a knee air bag unit so I had one less thing to worry about. Removal or unmounting of the air bag unit is required to gain access to 2 of the 9 glove box screws. If you do have an airbag unit and need to lower it, I’d recommend disconnecting the battery. All you need to do is lower the air bag unit. Don’t disconnect the cable that goes to it. In general, I’d say disconnect the battery before you start this DIY.
After removal of all the trim, I found what looked like an Android unit already installed plus another unit that looked similar to it, right above the glovebox. It had the same LVDS video cable connection and a dummy cable sitting behind the air vents. I tried to look into the routing of all the wiring and could not figure it out. It was frustrating. I wasn’t sure if the unit was active. It had a label on the unit that said Parking Assist feature. I wasn’t sure if the car’s reverse camera was connected to this unit. Not all versions of the 3 series had a factory reverse camera. Some were aftermarket installed. Without knowledge of what wires I could remove or even remove this unit, I decided to put a hold on this DIY. This unit was hidden in the section towards the left of the cars stock head unit. I took some pictures of the unit, did a bit of googling for a whole week, looking at wiring diagrams, etc. Figured out the box was linked to a Pioneer TV Tuner unit. These were popular in Japan back when this car was new. The previous owner must have installed this. Once the car was imported in to New Zealand, they disabled the unit. However, I could see a power lead running to the Pioneer TV Tuner box.
DIY Part 2 : Started and Completed. Between 5 and 6 hours of time.
Getting started was easy. I had removed all the dash trim as before. This time around, I had a Bosch Go electric screw driver. Made a world of a difference.I traced all the wiring for the Parking Assist box to the Pioneer unit and removed whatever I could, including the decoder boxes. As expected, nothing was connected to the cars main head unit. However, rogue cables were running everywhere. There’s still some excess cable which I decided to leave in the car such as 4 TV Antennas as the routing was going all the way from under the dashboard and towards the lower trim, besides the passenger front seat. They were also zip tied to some of the cars original wiring harness. I was nervous touch anything that could disturb this setting. One error with cutting or removing any of the cars stock wiring on these complex Euro cars and you’re done with the car.
First step was connecting the Road top power cable harness with the stock harness behind the head unit. This is pretty much THE main cable where everything plugs in and works. The process can be a little hard as stock cable play is minimum and the head unit is rather heavy. The stock head unit harness can have a optical fiber cable on it (some of them don’t). You need to transfer that green optical cable onto the power harness cable that Road Top provides. This is relatively easy. The next part requires plugging in one end of Road Top’s power cable harness to the stock harness and the other end to the stock head unit. There is one more end of this cable which plugs in the Road Top decoder box. Sufficient length is provided.
Next step is taking the LVDS cable from the head unit (Was connected to the stock car screen) and routing that to the Road Top decoder box. Another LVDS video cable goes from the decoder box to the screen. This cable is provided by Road Top.
Next is taking the Aux Audio cable from the main Road Top power cable harness, routing in through the center console which has the gear shifter and plugging this into the Aux input below the arm rest. Some cars have this, some cars don’t. If you have a USB, Aux input below the center armrest, you need the aux cable connected, else there won’t be any sound. Videos show removal of parts of the center console to route the cable below the unit. I took the easy path and just routed it via gaps on the side of the center console, where it meets the cloth trim of the car. I used a little stiff copper wire to pull the cable into armrest area. Its not perfect but does the job and there are no cables visible externally.
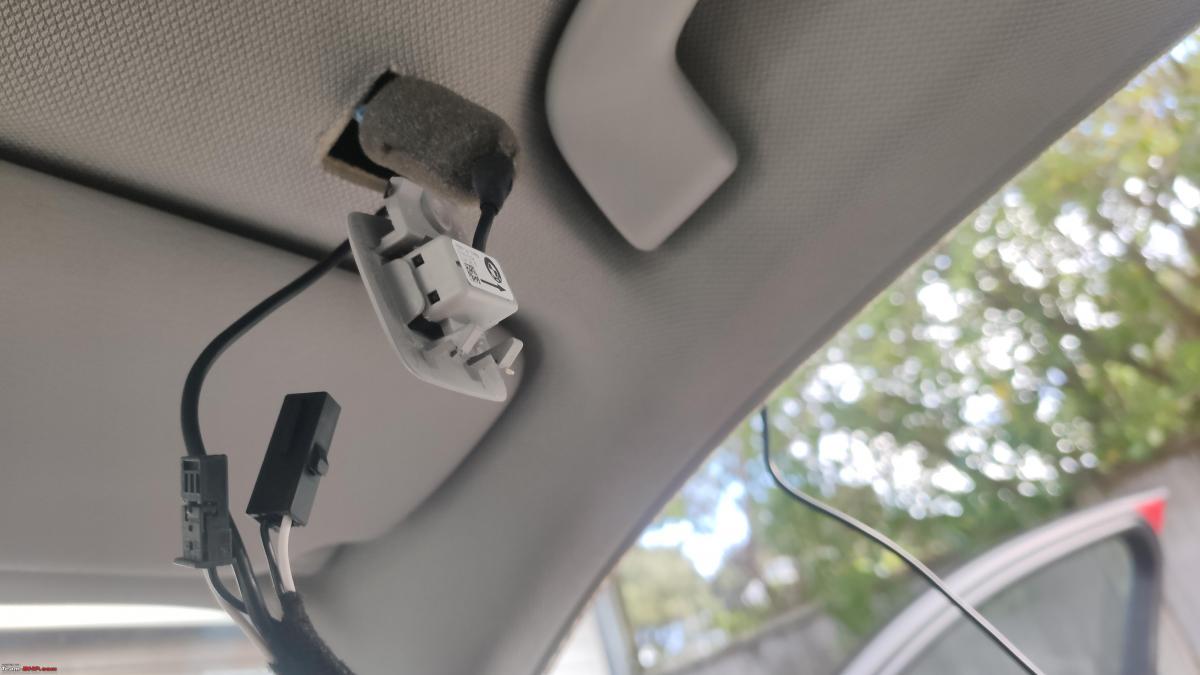
The next bit is taking the Road Top supplied mic jumper cable and plugging that into the mic on the roof liner. I did this on the drivers side. I don’t know if you can do it via the passenger side instead. It will make routing the cable a little easier as you’ve dropped the glovebox. Once again, this is a requirement for the CIC HI stock head unit equipped cars. NBT and later probably don’t need this step. You need to pull out a little plastic trim on the side of the dashboard and pull away some of the door rubber trim leading up to where the mic is located. The mic pops off easily with a trim tool. Disconnect the mic from the stock wiring harness. Using the Road Top supplied mic tap, you need to plug one end into the mic and the other end into the stock wiring harness. This ensures you can continue to use the mic via the stock iDrive system and Apple Car Play/Android Auto. Routing the mic cable via the roof liner and A pillar needs some care. I used a little copper wire to get over the A pillar air bag and pull the mic cable over this and down the A pillar. This mic cable needs to plug into the Road Top wiring harness. I used the same copper wire to pull the cable behind the dashboard and through to the other side of the glovebox. Tuck the cables and push the mic unit back into the roof liner, run the mic cable along the A pillar trim, put back the rubber door seal trim and put back the side dashboard cover we removed earlier. This whole process is relatively easy. Take care around the air bag unit is all.
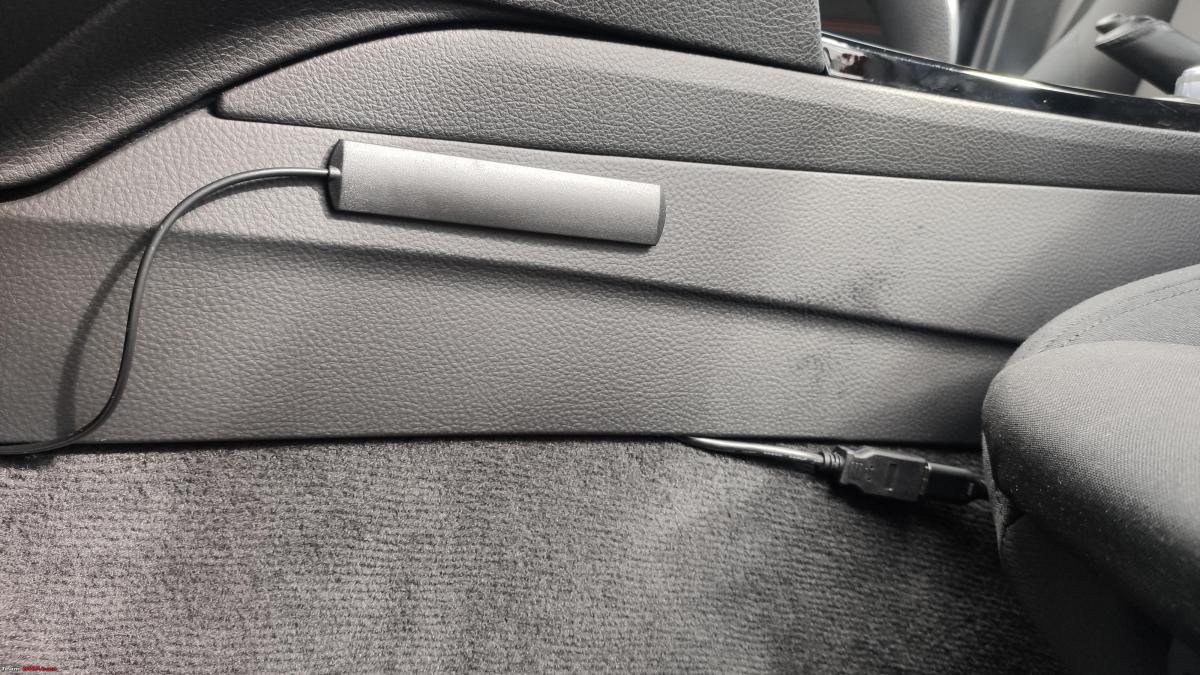
Next up is the USB cable and WIFI Antenna. While you don’t need the USB cable for wireless car play or android auto operation, you do need this for future system updates Road Top may send out. I needed the USB cable as my phone is running Android 10 and wireless Android Auto is available only on versions 11 and higher. I tucked the usb cable on the side of the center console, on the passenger side. The Wifi Antenna is stuck to the center console.
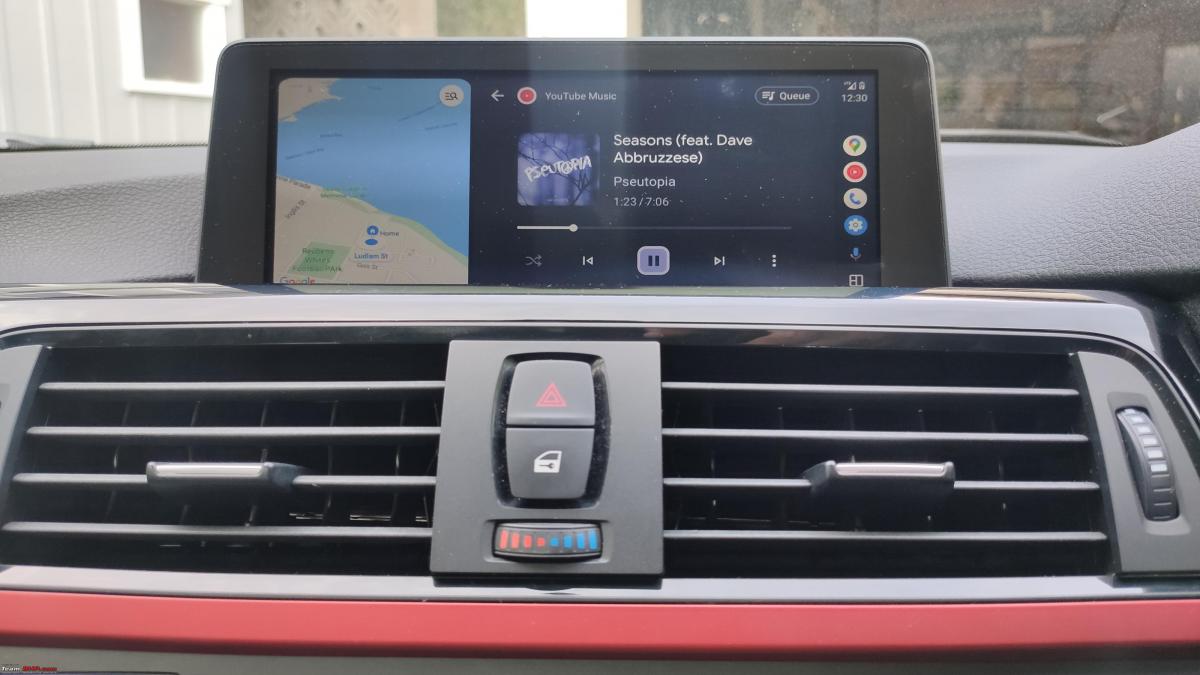
With all the cable work done, I decided to test the system out before doing any cable tidying, routing and putting everything back. Started the car and the usual iDrive screen popped up. A good sign. Next was to hold down the menu button on the iDrive controller for a couple of seconds. This takes you into the Road Top decoder unit settings where you initialize Car Play/Android Auto. As my method of connection was wired, it worked at the first go. I was quite thrilled to see Google maps load up full screen. The resolution, color rendering and quality of maps is surprisingly good for such an old idrive display unit. You use the idrive controller to navigate around the screen. Super easy to use and there is zero lag. The one thing odd I found with Android Auto is that you don’t have all the Apps on your phone available on the screen. I found only a handful of them. The essentials are there so I am not worried. I got YouTube Music App which is all I care about. Maybe there is a way to get all apps visible. Steering wheel controls work. You can navigate the display using the scroll wheel, adjust volume, trigger Siri/Hey Google, Take/Reject calls. Everything works as advertised by Road Top.
You need to disable or unpair your phone Bluetooth to the cars iDrive system and enable Aux input. Turn the Aux input volume up to 90%. If you don’t, there will be a imbalance in the sound for music while being played via Airplay and the various stock car chimes. This takes some trial and error to get all the volume levels balanced. Audio reproduction quality isn’t the best straight out of the Aux input. Fortunately, the Road Top decoder has a few Audio Presets, a customizable Equalizer and Loudness setting which allow you to compensate for some lost audio quality. Does the job. Don’t expect perfection to a stock and modern iDrive Harman Kardon unit. The one catch with adjusting audio parameters or the Equalizer is that you need to quit your Car Play session. You cannot make changes on the fly or hear changes as you make them.
With the test now successful, the next part was tidying up all the cables and mounting the Decoder box against a steel dashboard support brace. This is right between the glove box and head unit. There is a space there to place the decoder box. I used some 3M double sided tape for this. Only time will tell if this will hold up and hopefully no rattles surface. Its definitely a lot of of cables leading to the Road Top decoder box and there’s not much you can do about. I did the best I could of tidying them up while not causing too much stress to the cable bends.
Putting things back also takes some time. Pushing the stock head unit back into its slot needs some effort as the cables right behind it are more now. It can be done. A little patience and observation is all.
Refitting the glovebox is about the hardest part of this process. It goes in the same way you took it out. There are 4 support mounts under the glovebox that need to align. You need to do some acrobatics of looking below the glovebox area as you mount it back so you get this perfectly aligned. Not to forget, put back all the cables you removed that were attached to the glovebox such as the light, stock idrive usb cable and glover box lamp switch. 9 screws secure the glovebox.
Next you have air bag unit, if you removed it. Followed by the glove box under tray which has a cabin light connector you need to put back.
Put the screws back for the screen. Note that while the screws are the same T20’s for pretty much everything, the display screen screws are slightly shorter and thicker. I had made this mistake during DIY attempt 1 by putting in the wrong screws. The head unit will take another 4 screws to secure, followed by 4 more screws to mount the Climate Control unit. The final screwless bit is the AC duct and dashboard trim. This requires refitting the Hazard lamp and Hot/Cold wires and gently pushing the trim unit into the dashboard. Go easy while doing this.
As you would have understood by now, not the easiest or fastest of DIY jobs. There is nothing fast you can do here. This Road Top upgrade needs time and patience. No way you are going to do this in 30 minutes as shown on You Tube. Thats edited footage. I ran into complications primarily due to a third party decoder box already installed which took a whole week to figure out. Even without this, the process takes time. In the end, I am not regretting this upgrade. The screen is not a lot more useable than displaying the outdated idrive interface. You modernize the inside of the car a little bit. If you have the cash, I’d say go for Road Top Touch Screen unit. Will make things even better and more up to date.
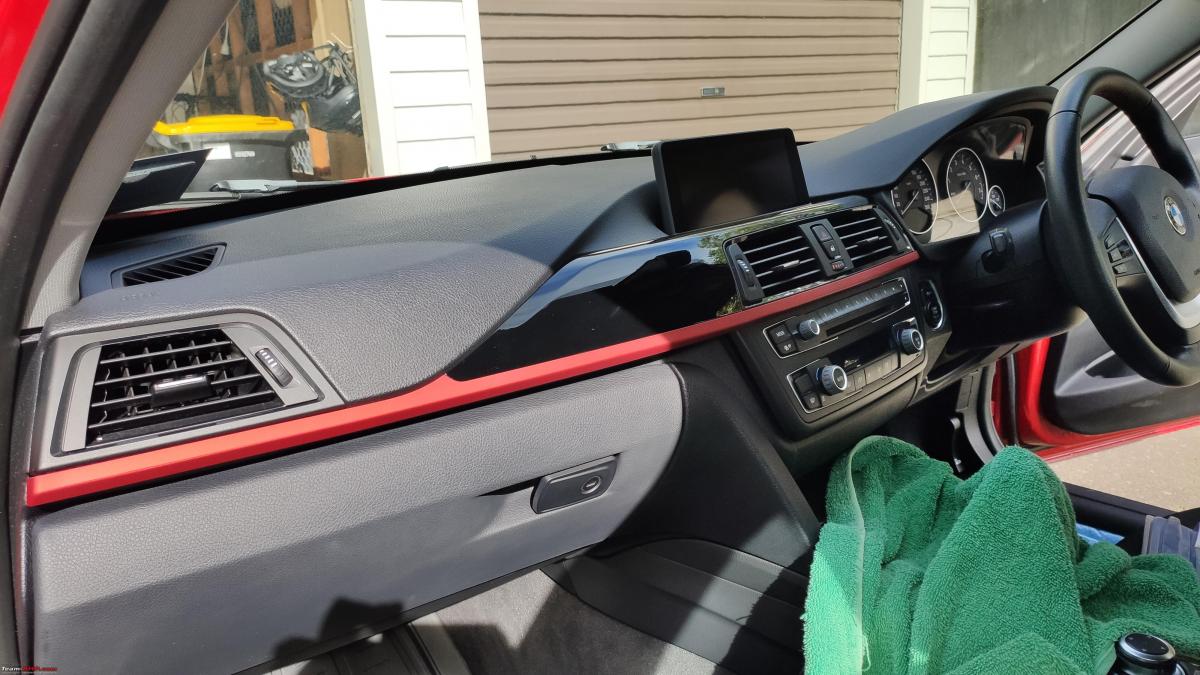
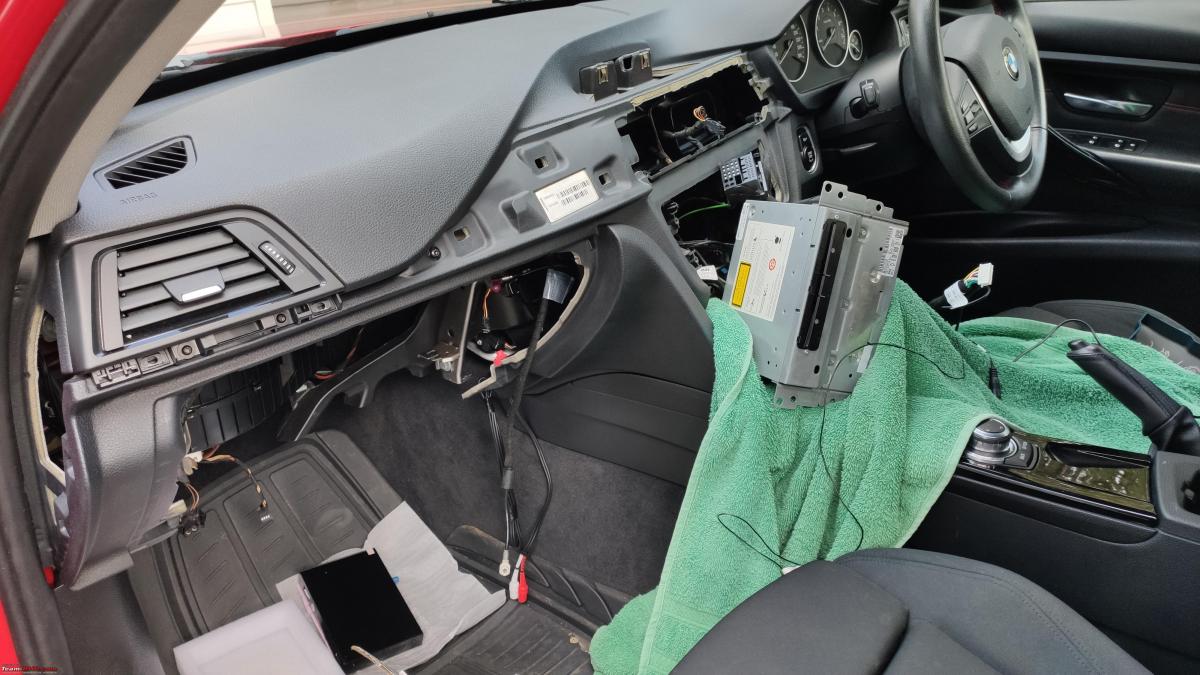
The dashboard, before ripping everything apart. The green towel on the center console is there to rest the head unit after taking it out. Its a heavy unit with a lot of sharp edges. Can damage the dashboard and console surface easily.
Lower trim removed. Some cars have a ambient light placed here. Some cars do not. You can see the disconnected wire for that here.
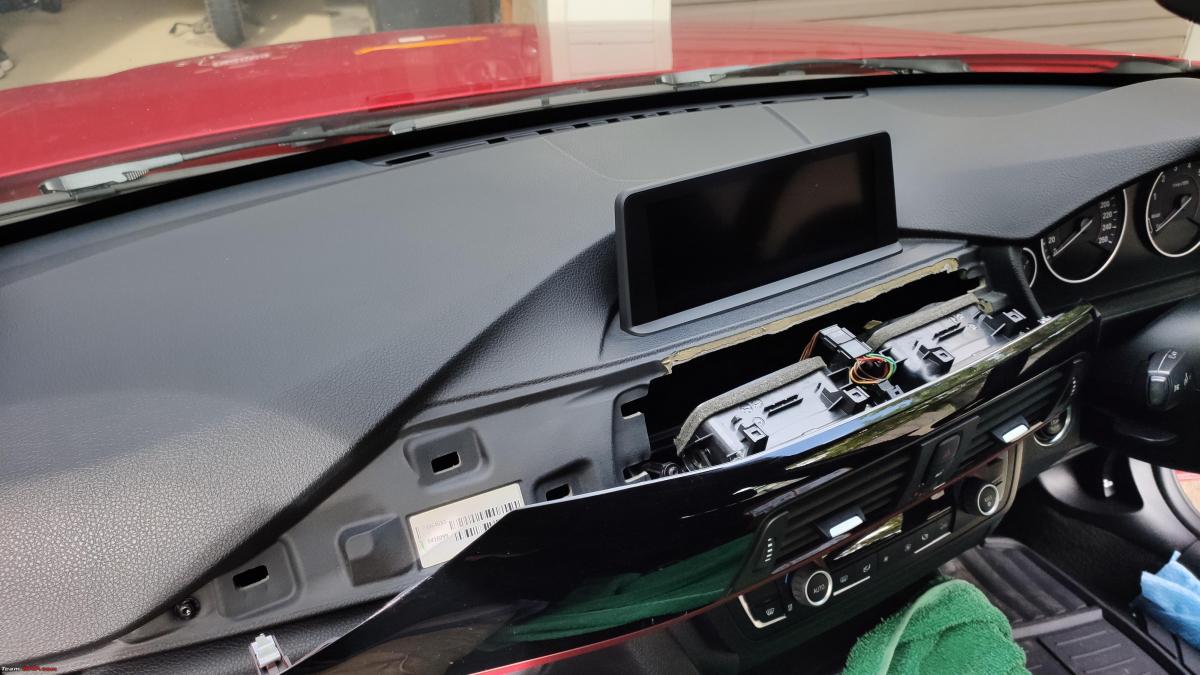
Taking out the AC duct trim piece. This is a long unit and requires a trim removal tool. Take care when removing this as the red strip at the bottom is delicate.
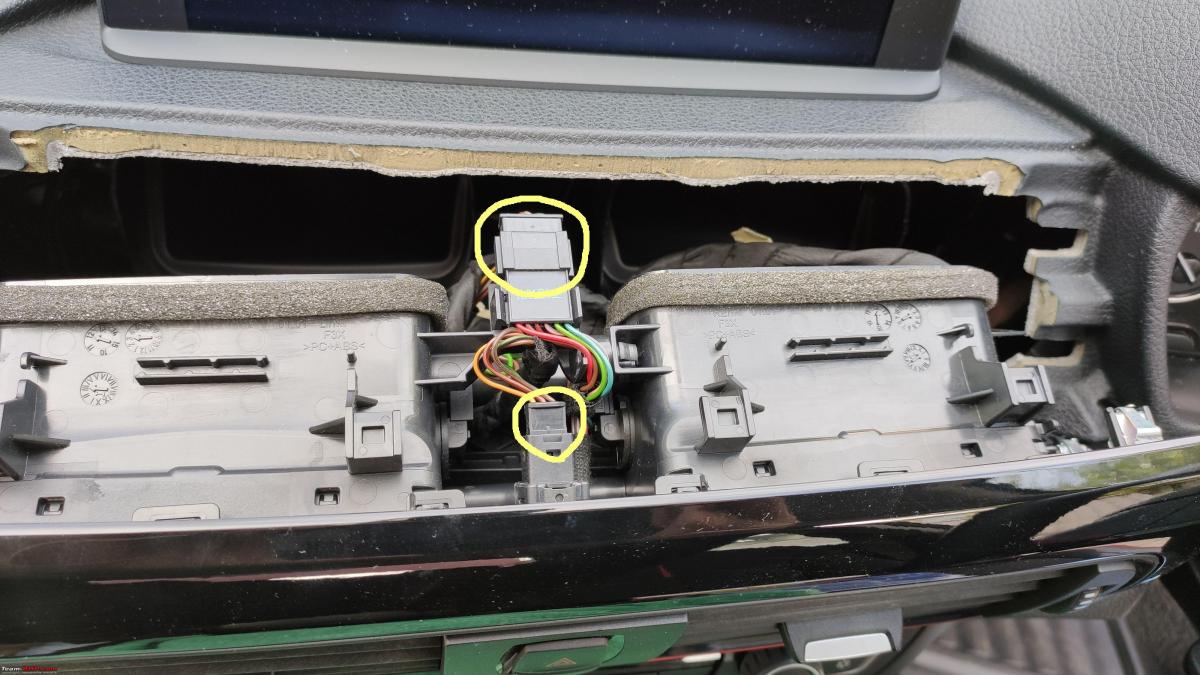
The two circled yellow connectors need to be removed. One is for the hazard/central locking switch and the other for the Hot/Cold air mix control.
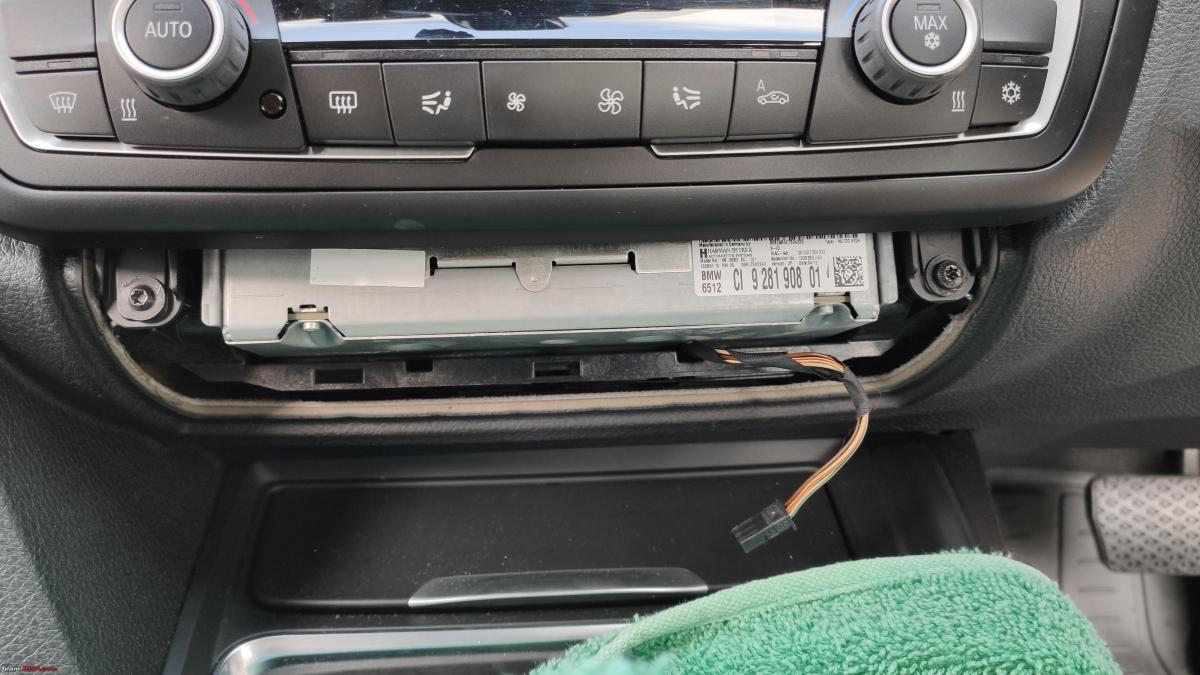
Next, take out the Climate Control unit secured by 4 screws. This revels the head unit. Cars with inbuilt navigation have this large 2 din sort of head unit. Cars that don’t have navigation have a 1din size unit. Makes it easier to place the Road Top decoder box below the head unit for the ones without inbuilt navigation.
Its a bit hard to see. Above and behind the internal AC ducts are two screw that you need to remove to take out the screen. Note that these screws are slightly different to the screws used to hold the head unit and climate control unit. Don’t mix them up.
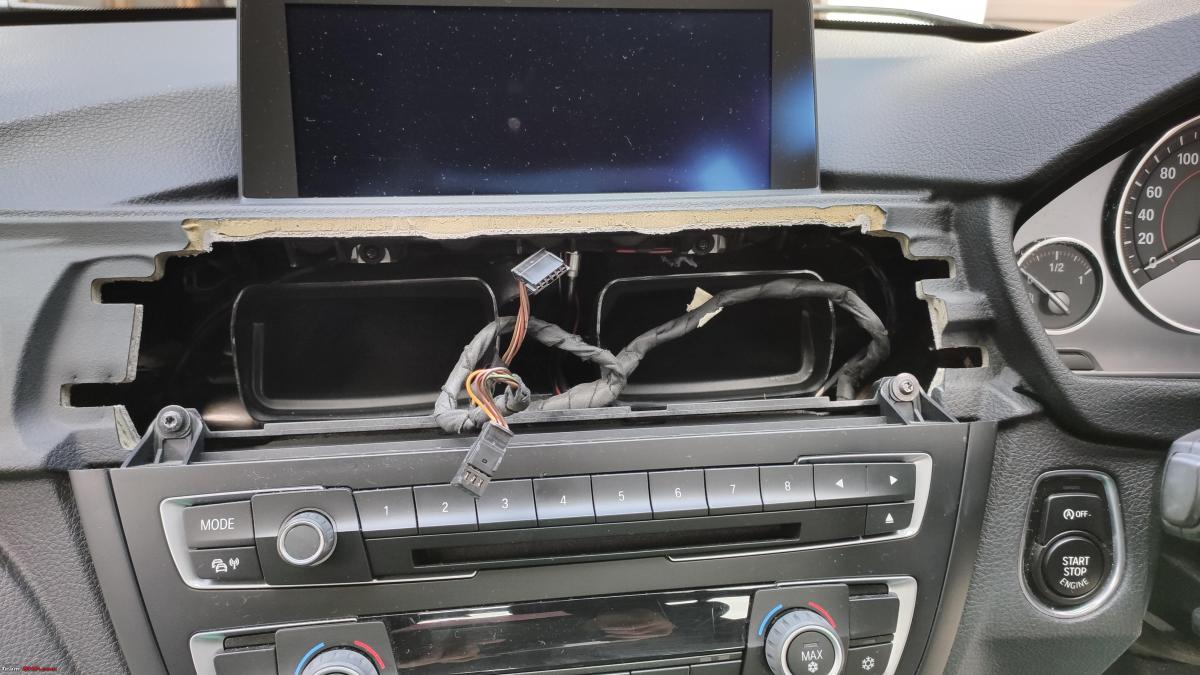
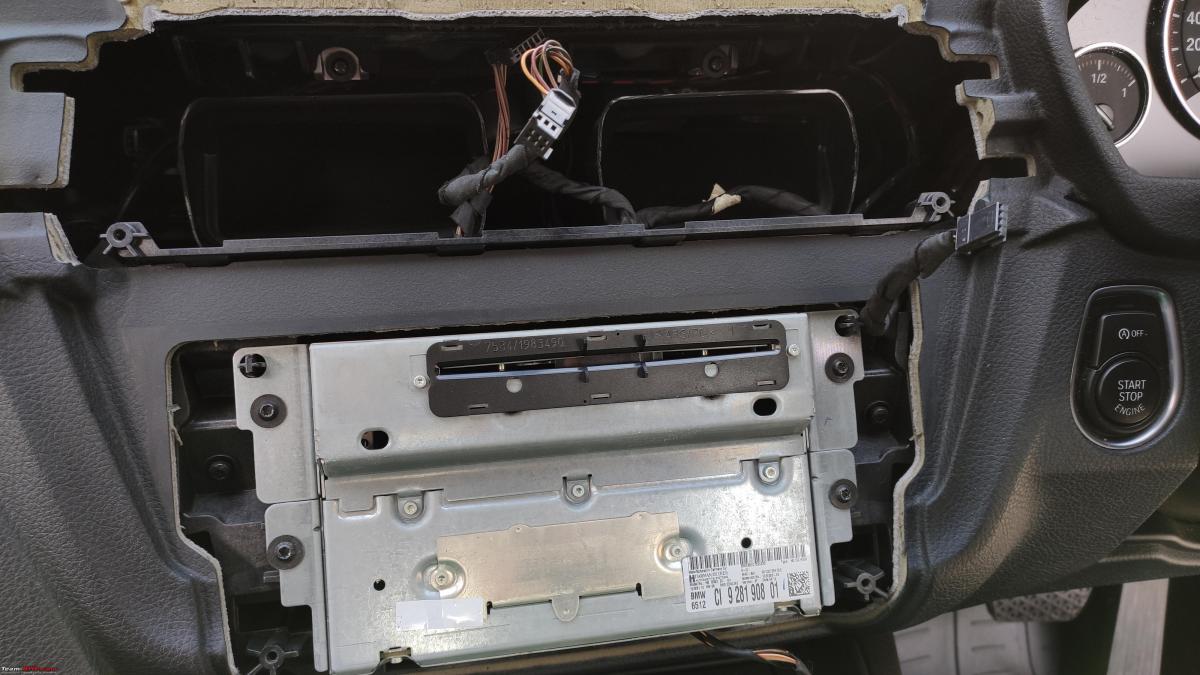
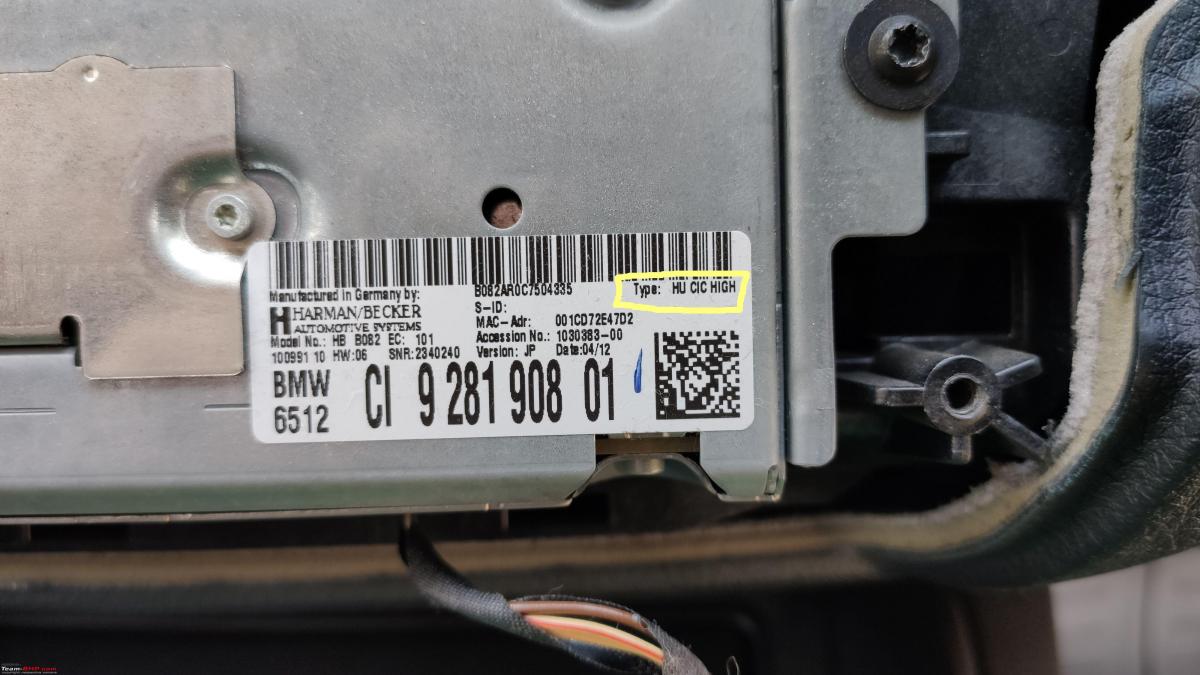
Yellow box marking the type of head unit. In this case CIC HI. Later generations are NBT and EVO.
There are some steps to the process where I missed taking pictures. Was too involved that I forgot.
The next stage requires dropping the glovebox thats secured by 9 screws. Not easily accessible and some will require odd angles. This is where a motorized tool comes handy. Before you can drop the glovebox, you’ll need to take out a glovebox under tray that hides all the screws. This under tray unit is secured by two bolts and has a cabin light fixture that needs removal. You’ll find in one of the pictures of a screw hole with no screw in it. Thats for the knee air bag mount. My car does not have a knee air bag unit so that slot was free.
Black box on the floor mat is the Road Top decoder box. Everything plugs into this unit.
Yellow U and Yellow box drawing are markers to align the glovebox when you refit. If you don’t get this right, you’ll be pulling your hair out. There is a similar thing to be observed on the other side of the glovebox too. Best is to take pictures before removal.
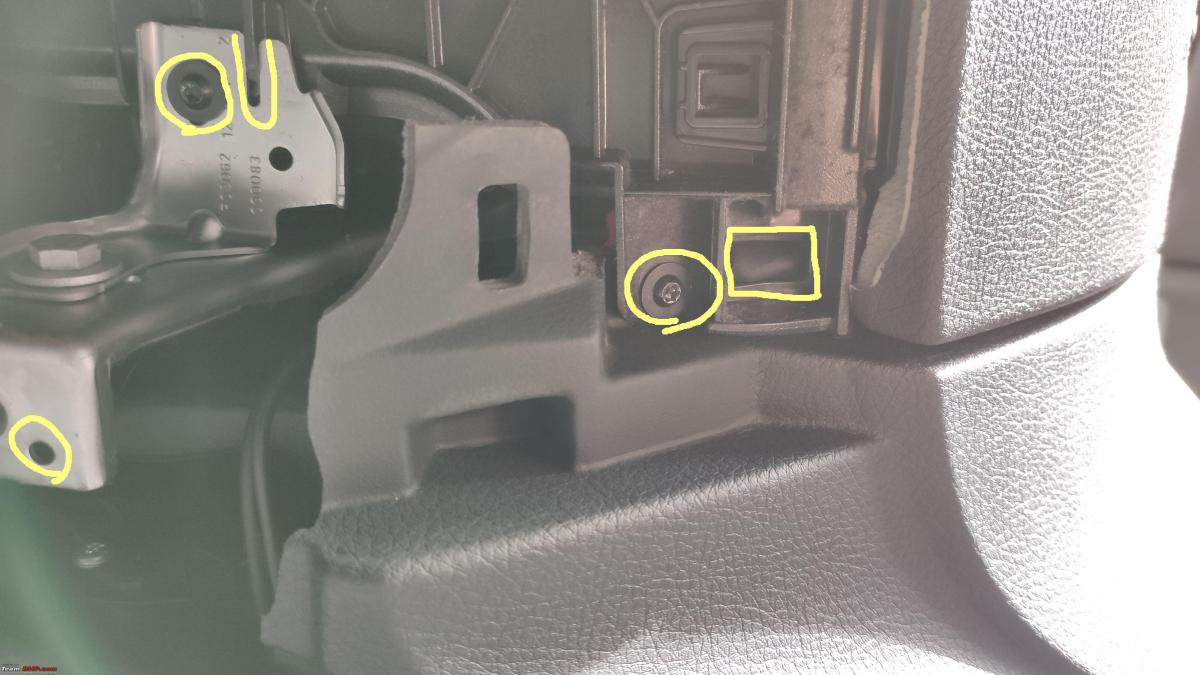
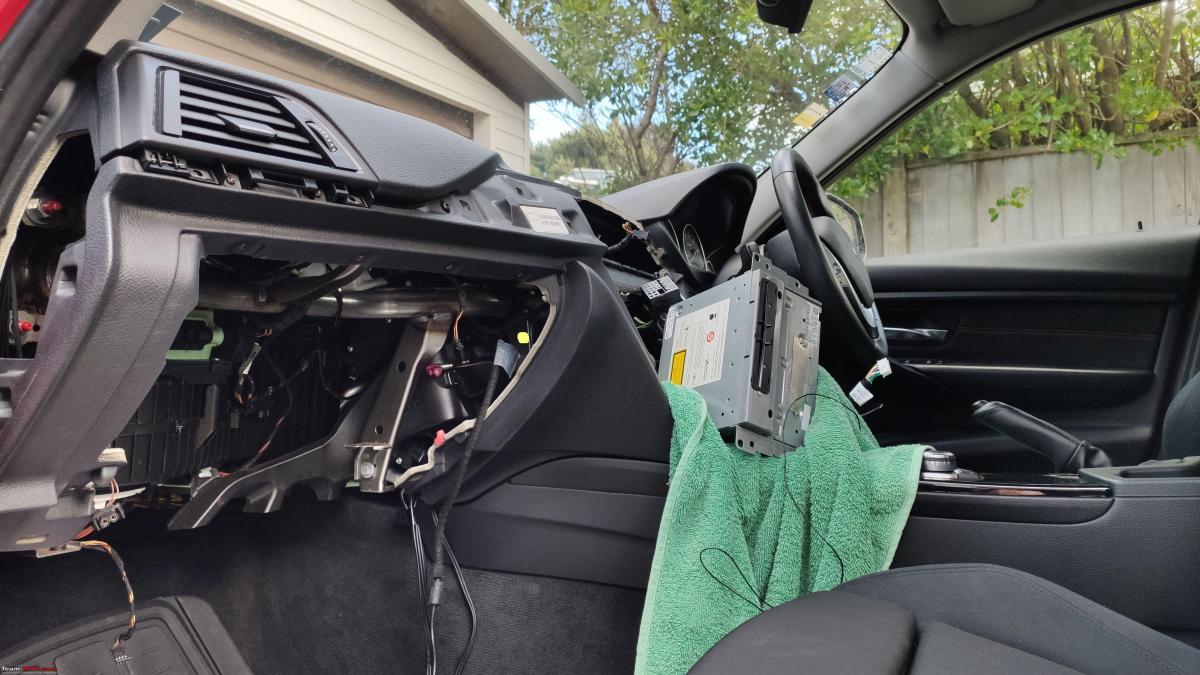
Yellow dot seen deep inside the glovebox (right edge) cavity is the location of a steel dashboard brace. This is where I secured the decoder box. This was the same point where the Japanese Parking Assist box was placed.
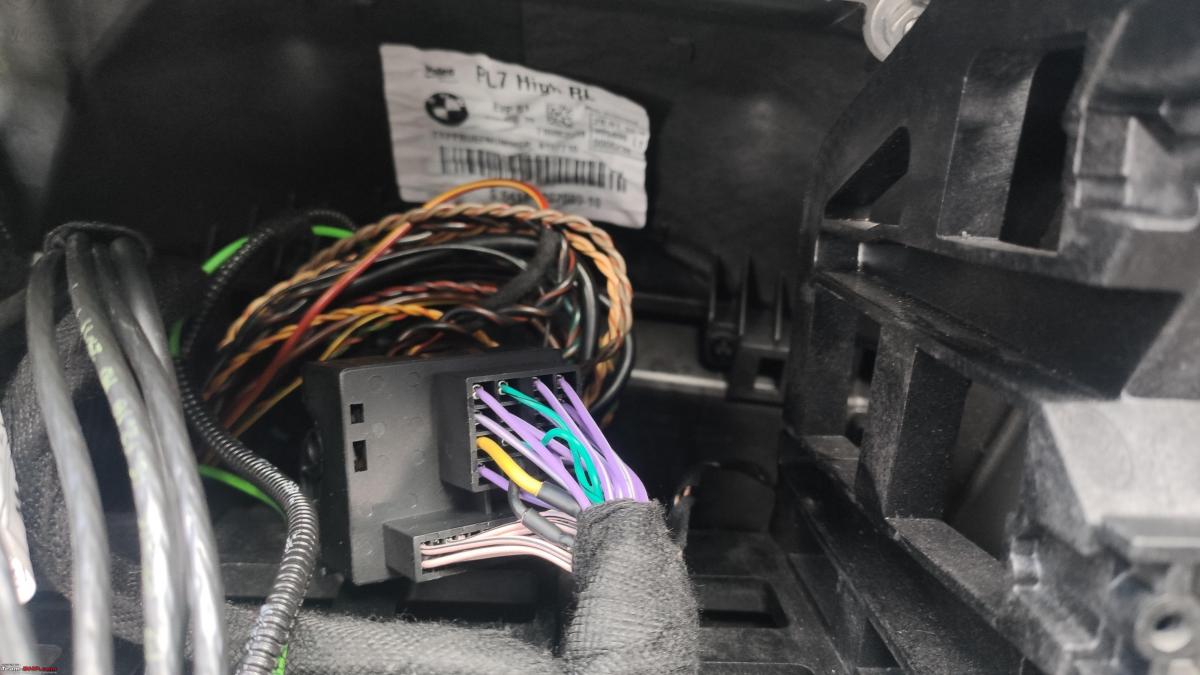
The quad lock connector. You’re looking at the Road Top connector that is connected to the cars Quad Lock connector unit. Its a big block connector that secures a green optic fiber cable on some cars. For cars with this cable, you need to take it off the cars quad lock connector and move it over the connector supplied by Road Top. The thick cables, limited stretch to the stock car quad lock cable make it hard to push all the cables back. Not easy work.
Next up was the mic tap. You need to do this for CIC HI equipped cars, else the mic won’t work. Road Top supplies this mic tap cable. You need to take out the stock mic and disconnect from the stock wiring harness. Take the Road Top mic tap wire and connect one end to the stock mic wiring you just disconnected and the other end to the mic unit. Run the cable via the roof liner, down the A pillar and through the dashboard. I used a stiff copper wire to pull it across the dashboard. This is not a hard process. Take care around the curtain air bag unit and run the mic tap wire over the air bag. In the event the air bags has to deploy, the wire won’t come in the way.
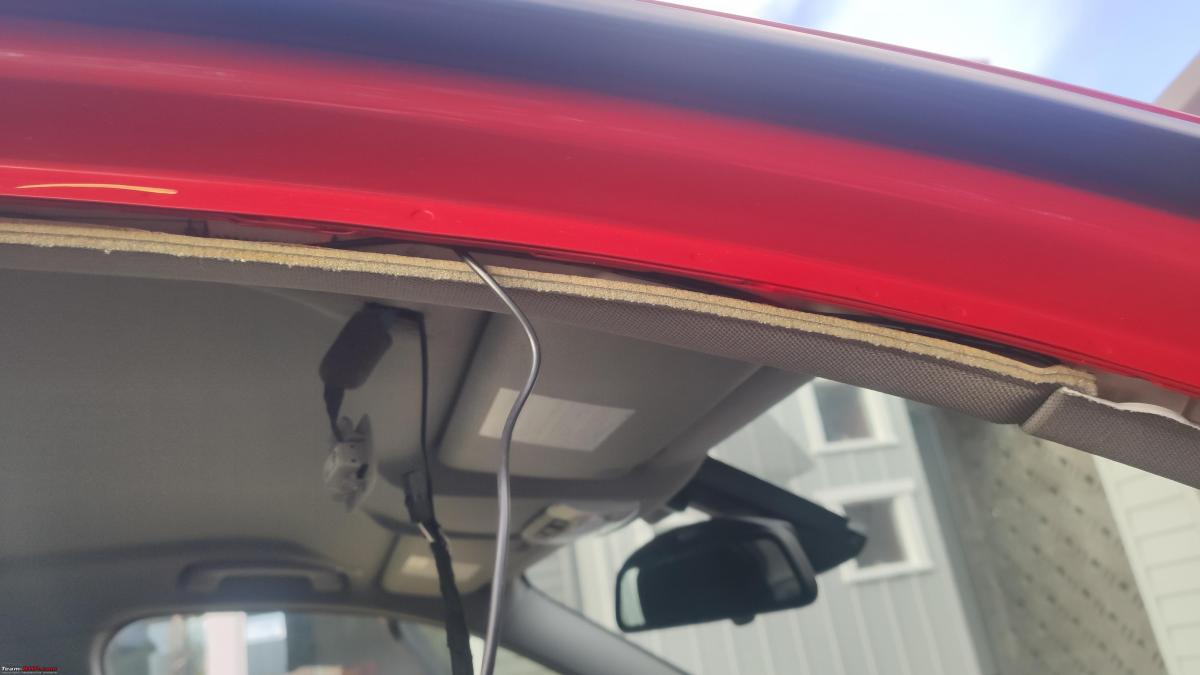
Securing the WIFI Antenna and USB connector. The WIFI antenna should not be stuck onto anything metal. Its possible to stick it on the glove box under tray. I stuck it to the center console. I can always move it later.
The all important Audio Aux cable you need to connect on CIC HI enabled BMW Head units. This cable runs from the Road Top main wiring harness, through the center console and into the armrest. I pulled the cable via gaps on the side of the console. Some folks have removed parts of the gear console for routing. I chose not to do that.
Test run and taking Android Auto for a spin. Works flawlessly. Stock iDrive based Reverse camera is triggered automatically and the display switches and goes back. The only thing I’ve noticed is that when I am done reversing, my car camera tends to stay on for a little longer. Unless I pop the gear shifter into D, it won’t go back to Android Auto. Some fine tuning needed in the Decoder box settings.
You can prioritize which app to populate the larger part of the screen or make Google maps populate the entire real estate of the screen if you like.
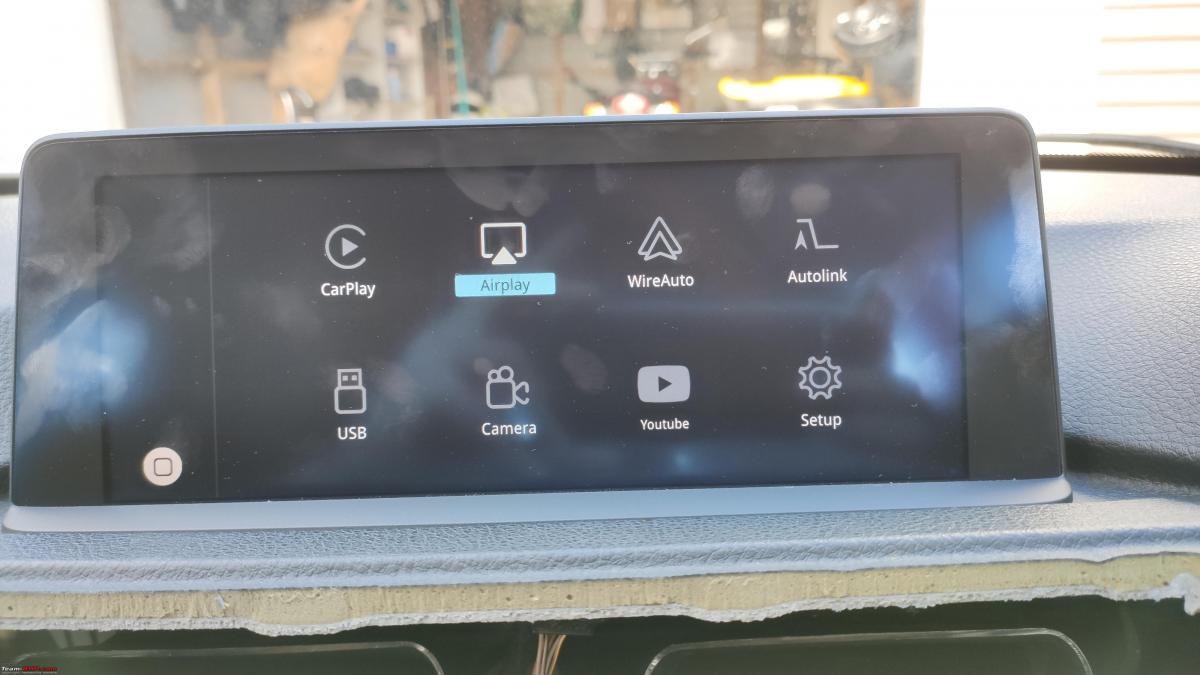

Keyword: Added Wireless Apple Carplay to my decade old BMW: Here's how
